Monday, April 11, 2011

Amaranth-Bottlegourd Stew flavored with Mustard Paste/Thotakura-Anapakaya(Sorakaya) Ava Pettina Pulusu

This is another delicious and healthy stew made in my family since generations.If you are one of those people who enjoys the spicy hot flavor of mustard,this dish is for you.Not only that ,this is a great dish to enjoy during winters as the mustard gives nice heat to the body and helps our body to be safe from the seasonal colds.It is good during winters does not mean you can't make it in other seasons, you can try this dish anytime you have all the right ingredients handy.

Let us see how this delicious stew is prepared---------------

Main Ingredients :
--------------------
Amaranth Greens...............1 big bunch
Bottlegourd........................1 small
Mango Pieces....................5(frozen)
Green Chilly.......................3
Water................................enough to cover the veggies

Mustard Paste Ingredients :
-----------------------------
Green Chilly........................1
Mustard Seeds....................2tsp
Raw Rice...........................1tsp(soaked in water for 5minutes)
Sesame Oil.........................1tsp
Turmeric............................pinch
Tamarind Paste..................1tsp
Water................................2tsp


Seasoning Ingredients :
-------------------------
Sesame Oil.........................2tsp
Mustard Seeds...................1/2tsp
Cumin Seeds......................1tsp
Red Chilly..........................1 large(broken)
Asafoetida/Hing.................1/8 tsp
Tamarind Paste..................3tsp
Turmeric...........................pinch
Rice Flour.........................2tsp(for thickening)
Salt...................................to taste

Preparation :
----------------
Wash the veggies under cold water.Cut the amaranth greens including the stalks and place them in a cooking pan.Peel the bottlegourd and cut it into small cubes and add them to the pan of greens.Now add water,slit green chillies,mango pieces and turmeric to the veggies and cook them covered on medium high till the veggies are cooked.
Once the veggies are cooked make a paste with the rice flour and water and add it to the boiling stew.Also add the tamarind paste and let it cook for few more minutes.Meanwhile place all the ingredients mentioned under Mustard Paste into the blender and blend them well to make a fine paste.


Add this ground mustard paste and salt to the simmering stew and mix well.Let cook for 5 more minutes.


While the stew is simmering make the seasoning/tadka by adding oil to a pan.Once the oil is hot add mustard seeds,cumin seeds,red chilly and hing.Once the seeds start to splutter add it to the simmering stew and switch off the stove.

Delicious Amaranth-Bottlegourd Stew Flavored with Mustard Paste is ready to be served with warm rice and papad/gummadi vadiyalu/dahi mirchi.This stew is a tasty side dish for rotis too.

Note :
---------
1) I had some frozen mango pieces handy so I added them,if you don't like it you can omit it .

2) You can use spinach instead of amaranth in this stew.

3) Do not make dishes with mustard paste very often as it might cause over heat to the body.

Friday, April 8, 2011

Reposting for CWF-WF/WV:Tomato Event guest hosted by Sanyukta.

Hi friends , in 2 days the CWF-WF/WV:Tomato Event being guest hosted by Sanyukta is coming to an end.Please send your delicious and creative tomato recipes to her before the event ends.

I am reposting the following recipes for this event-----------


1) Bottlegourd and Tomato Rice(Healthy & Lowfat)

2) Tomato-Perugu Pachadi/Tomato Yogurt Chutney

3) Simple Tomato-Cucumber Daal

Tomato & Bottlegourd(Lauki) Peel Chutney/Tomato & Sorakaya(Anapakaya) Pottu(Thokkala) Pachadi

This is yet another delicious and healthy chutney that can be enjoyed with warm rice and ghee or as a side for dosa,idli and rotis/chapatis/parathas.This chutney is very easy to make and delicious to taste.

Let us see how this delicious chutney is made---------


Main Ingredients :
--------------------
Bottlegourd Peel...................from 1medium sized bottlegourd(cleaned and cut)
Tomatoes.............................2 medium size(cut into chunks)
Green Chilly.........................3(to taste)
Dried Mint...........................1/4cup

Seasoning Ingredients :
--------------------------
Sesame Oil............................2tbsp
Red Chilly.............................1(to taste)
Chana Daal...........................1/2tsp
Urad Daal.............................1/2tsp
Mustard Seeds......................1/2tsp
Cumin Seeds.........................1/2tsp
Coriander Seeds....................1tsp
Asafoetida/Hing.....................1/8tsp
Turmeric................................1/8tsp
Garlic Cloves........................2(optional)
Tamarind Paste......................2tsp(to taste)
Salt.......................................to taste

Preparation :
----------------
Place a pan on the stove on medium high heat and add 1tbsp oil.Once the oil heats up add all the seasoning ingredients except tamarind,turmeric and salt.Once the seasoning is ready take it out from the pan and keep it aside.Now add the remaining 1tbsp of oil to the pan and to this hot pan add the slit chilly and the cut bottle gourd peel and let cook for few minutes.


Once the peel is cooked a little, add the cut tomatoes and turmeric and cook for few more minutes till done and switch off the stove.Add tamarind to the warm veggies.


Once the cooked veggies are cooled transfer them  to a blender and add salt ,dry mint and half the seasoning to it and blend well.Remove the blend chutney into a serving bowl and top it with the remaining seasoning.


Delicious Tomato & Bottlegourd Peel Chutney is ready to be served.

Note:
--------
1) In this chutney along with the bottlegourd peel ,I used the soft white pulp with the tender seeds too in the chutney.

2) You can use fresh cilantro or fresh mint instead of dry mint.


This goes to CWF-WF/WV:Tomato Event guest hosted by Sanyukta and started by me .

Monday, April 4, 2011

Happy Ugadi,Gudhi Padwa ,Cheti Chand & Yugadi !

My Hearty Wishes to all the Visitors of  Sumadhura who are celebrating UGADI,GUDHI PADWA, CHETI CHAND & YUGADI today.May this NewYear bring you more patience and perseverance,strength to bear the joys and sorrows alike and shower you all with good golden health.

To all my Telugu friends ------

 మీ అందరికీ శ్రీ ఖర నామ సంవత్సర శుబాకాంక్షలు !

To all my Marathi friends ------

गुदिपाद्व्याचे  हार्दिक  शुभेच्चा !

To all my Sindhi freinds ------

चेती चाँद  ज्यों लाख लाख वदयुं अठाव  !

To all my Kannada friends ------

ಯುಗಾದಿ  ಶುಭಾಶಯಗಳು !

Wish you all a Happy & Healthy Year Ahead.

Saturday, March 26, 2011

Instant Poha-Oats Idli with Flaxmeal & Dry Mint/ Atukulu(Flattened Rice) and Oats Idli & Pancakes(Uthappams)

Today I am sharing with you another delicious and healthy Idli that can be made instantly with the combination of Poha and Oats.Yes, you read it right again---the superstar ingredients of this idli are Poha/Atukulu/Flattened Rice and Oats.Not only that , the addition of Flax Meal and  Dried Mint brings in more richness and flavor to the dish.If you are someone who does not like to add semolina/sooji to the instant idli then you can substitute with oats.

Let us see what are the ingredients required for this delicious idli and how it is made--------------

Main Ingredients :
-----------------------
Thick Poha.....................3cups
Thick Oats.....................2cups
Dried Mint......................2tbsp
Flax Meal.......................1/3cup
Yogurt............................3cups(thick,beaten)
Carrot...............................1med(grated)
Dry Ginger Powder............1tsp
Ajwain/Vamu....................1/2tsp
Salt...................................to taste
Baking Soda.....................1tsp
Water..............................a little as needed
Olive Oil..........................little to add in the batter/little for the uthappams/little to coat the idli plates

Preparation :
-------------------
Take the thick oats and grind it to a coarse powder.Add the coarsely ground oats to the poha.


Take the poha and wash it thoroughly under cold water so that there is no dirt or sand in it.Now squeeze the excess water from poha and place the cleaned poha in a container.Later add the flax meal,dry mint, ajwain,dry ginger powder and grated carrot to the poha-oats mix.


Now mix all the ingredients in the container along with little olive oil by using your hand and slowly add the thick,beaten yogurt(to which salt is added) to the poha-oats mix and incorporate the ingredients into a batter.


Keep it in mind that you already cleaned the poha with water,so it does have moisture in it even though you squeezed out most of it.As we are using thick oats we might need to adjust water accordingly and make sure the batter is nice and thick and not runny.If it is too thick you may add few drops of water at a time and make sure the batter is in the thick side but a little loose.


Let the batter rest for 20 minutes and meantime you prepare the idli plates by applying oil to them.Place a pot or dish with water on the stove and let the water get to a boil,make sure to cover it.Now add the baking soda to the batter and mix it thoroughly and spoon the batter into the idli moulds/plates and place the idli stand in the boiling pot of water and cover it and let cook for 15 minutes.


After 15 minutes switch off the stove and let the steam cool down and remove the idli's and serve them with your favorite chutney or spice powder or sambar.


Delicious Poha-Oats-Flaxmeal-Mint Leaves Idli are ready to be served.


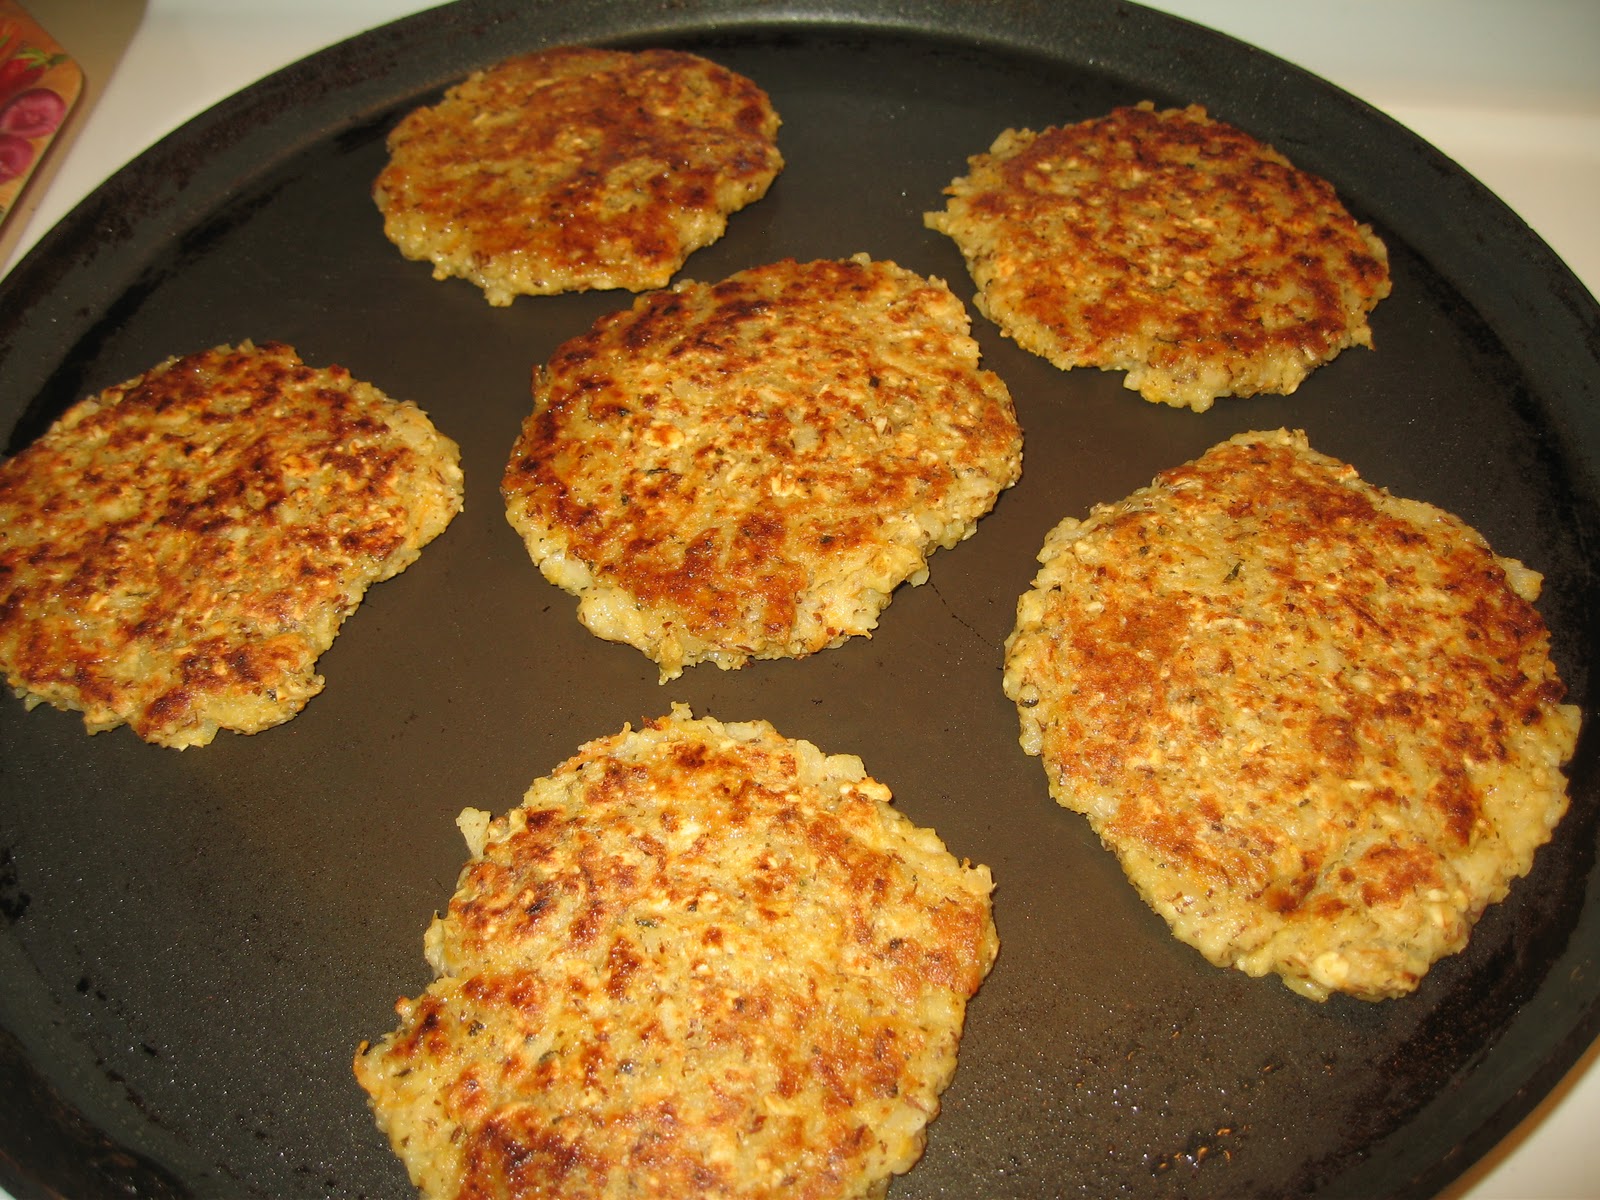
With the above ingredients I could make 20 Idlis and with remaining batter I made 6 small Pancakes or Uthappams.For the pancakes I used very little oil for making them.Here they are--------


Note :
---------
1) This is the first time I made these idli's by combining oats and poha.We all loved them.A new way to enjoy the goodness of poha and oats.

2) Make sure you don't add too much liquid to the poha.Make sure the batter rests for just 20 minutes as we are uing thick oats.If the batter is soaked for long it becomes very soggy.

3) You can add chopped chilly and ginger for extra flavor.Instead of ginger I added dry ginger powder also known as sonth powder .You can also add dry methi instead of mint.

4) This is the first time I added dry mint to idlis and it was definitely flavorful.You can skip it if you don't like mint.

5) My daughter voted for the idlis and my son voted for the uthappams  but they enjoyed both of them,hope you would too.

Thursday, March 24, 2011

Tasty and Healthy Juices on Thursdays : Juice Recipe #23

Finally, after a long break I am sharing a delicious juice recipe this Thursday.This juice recipe has been concocted by dear Jay with combination of fruits and veggies.This juice is very tasty and healthy.We all loved this and hope you would too.

Juice Recipe # 23 :
------------------------


We need the following ingredients for making this juice---------

Carrots..........................3(large)
Cucumber......................1(medium)
Strawberries..................8
Apples..........................2
Celery...........................2sticks(medium)
Ginger...........................1inch

Preparation :
------------------
Rinse the fruits and veggies under cold water.Remove the husk from the strawberries.Now juice the carrots  followed by strawberries followed by an apple followed by cucumber followed by another apple followed by celery sticks followed by ginger.Stir the collected juice in the bowl with a ladle so that the juices blend in and serve the juice immediately.

This yielded 4 large glasses and 1 small glass of juice.The juice was orange in color.

Note:
---------
1) As always, do check if the ingredients used in the juices are okay for you ,before you make these juices.

2) In a juicer always try to juice the soft fruit followed by hard fruits so that you can get the maxium juice out of the soft fruits.

3) A food that is healthy for one person may or may not be healthy for an other person.Always check with your doctor before you try these raw juices.

4) Wash the cucumber nicely and juice it with the peel (the peel has lot of good nutrients in it). If you don't like the peel you may remove it.

Tuesday, March 22, 2011

Swiss Chard Chutney

Couple of days back my friend mentioned that she made a delicious chutney with swiss chard and said that it tasted just like Gongura Chutney/Red Sorrel Leaves Chutney.When I asked her if she could share her recipe , she was very happy to share it with us and here is the recipe in her words.Thank you Sujatha.K for sharing this healthy and delicious recipe with us.

Here is the Swiss Chard Chutney recipe in my friend's word--------------------

Swiss chard has many benefits, it has good iron content and good alkaline nature food, good for sugar regulation, rich source of ani-oxidents and phytonutrients.

Ingredients :
---------------
Swiss Chard ................1 bunch(washed and cut including stems)
Tamarind paste............ 2 tsps
Cilantro stalks.............. handful
Turmeric......................1/4 tsp
Salt..............................as per taste
Red chilli......................as per taste, I put 3 long ones

Seasoning :
----------------
Canola Oil...................3tsp( 1 spoon for swiss chard and 2 spoons for seasoning)
Chana Daal..................1/2tsp
Urad Daal....................1/2tsp
Mustard Seeds.............1/4tsp
Cumin Seeds.................1/4tsp
Asafoetida ....................very little amount

Preparation :
-----------------
Heat one tsp of oil and fry the washed and cut swiss chard breifly

Prepare the seasoning: Remove the cooked swiss chard and put 2 more tsps of oil and put all the ingredients of seasoning one after other and let them splutter. Add turmeric in the end.

Transfer the seasoning into the grinder container and add turmeric, salt and cooked swiss chard and cilantro stalks to it and grind it finely. Delicious Swiss Chard Chutney is ready to be served.

Hope you like it.
Sujatha.

Once again thank you for sharing this delicious chutney with us.I will try it soon and let you all know how we enjoyed it and hope you would try it too.

Saturday, March 19, 2011

Araithokkalu & Carrot Pachadi/Plantain Peel & Carrot Chutney/Carrot & Raw Banana Peel Chutney

Hello friends,this is an other delicious and healthy chutney that I tried by combining raw plantain peel, carrot and cilantro stalks.It turned out to be very tasty and we all enjoyed it with warm rice and also as a side for chapatis and dosas.Hope you will try it and find it delicious too.


This is how the recipe goes------------

Main Ingredients :
--------------------
Plantain/Raw Banana Peel............1 large steamed
Carrot.........................................1 large steamed
Green Chilly................................4(small)
Garlic Cloves..............................3(small)
Tamarind Paste...........................2tsp
Yogurt........................................2tsp
Turmeric.....................................1/4tsp
Salt.............................................to taste
Cilantro Stalks............................handful

Seasoning Ingredients :
---------------------------
Sesame Oil..............................2tsp
Red Chilly...............................1 large(as per your taste)
Chana Daal.............................1/2tsp
Urad Daal...............................1/2tsp
Mustard Seeds........................1/4tsp
Cumin Seeds...........................1/4tsp
Asafoetida/Hing.......................1/8tsp

Preparation :
------------------
Wash the plantain/raw banana and the carrot under cold water and remove the tips and cut them in halves and pressure cook them for 2 whistles.Once the pressure cooker cools down take veggies out from the cooker and peel the plantain skin and cut the peel & carrot into big chunks and put them into the blender.Also add the turmeric,salt,cilantro stalks,tamarind paste and yogurt to the blender and blend them.
 
 To prepare the seasoning place a pan on the stove on medium heat and add the oil to it.Once the oil heats up add the chana daal,urad daal, mustard and cumin seeds.Once they start to splutter add red chilly,garlic and slit green chilly to the seasoning and fnally add hing and switch off the stove.Now add a little of the seasoning along with garlic and chillies to the chutney in the blender and blend it well.Once done tranfer the chutney into a container and add the remaining seasoning to it.

Delicious Plantain Peel & Carrot Chutney is ready to be served.

Note :
---------
1) In this chutney I used only the plantain peel not the pulp.

2) This is an other way to use the plantain peel without discarding it as it has lots of healthy nutrients.

3) This chutney is very healthy because we use only 2tsps of oil just for the seasoning.

Saturday, March 12, 2011

CSN Promo and Instant Poha Idli with Flax Meal & Methi Leaves

I am sure that many of us in this virtual world of blogging have come across the name CSN Stores many a time.This online shopping stores has made shopping a jiffy for most of the shoppers who prefer to shop at the comfort of their home.They have a wide variety of products to offer for any age group from a diaper to a draper or a  laptop messenger bag to  travel bags.They are affiliated with hundreds of online stores which accomodate the customers with easy shopping and quick delivery of products.

Next time you plan to shop around try to check out the online CSN Stores,I can vouch that you won't be dissapointed.

Ok, now lets get to the recipe of the day.Yes, you read it right in the title---the main superstar ingredient of this idli is Poha/Atukulu/Flattened Rice.Instead of making only Poha Upma or Lemony Poha or Poha Pulihora you can try this Poha Idli for variation.Let us see what are the ingredients required for this delicious idli and how it is made--------------


Main Ingredients :
-----------------------
Thick Poha........................4cups
Sooji Coarse.....................1cup
Kasoori Methi...................1/4cup
Flax Meal..........................1/3cup
Yogurt...............................3cups(thick,beaten)
Carrot...............................1med(grated)
Ajwain/Vamu....................1/2tsp
Turmeric............................pinch
Asafoetida/Hing.................pinch
Ginger..............................1inch(grated)
Green Chilly.....................2(finely chopped)
Salt...................................to taste
Baking Soda...................1tsp
Water..............................a little as needed
Oil..................................little to coat the idli plates

Preparation :
-------------------

Take the poha and wash it thoroughly under cold water so that there is no dirt or sand in it.Now squeeze the excess water from poha and place the cleaned poha in a container.Add the sooji/upma ravva to it.Later add the flax meal and kasoori methi/dry methi to the poha.Now add ajwain,grated ginger,chopped chilly,grated carrot and asafoetida to the poha.


Now mix all the ingredients in the container with your hand and slowly add the thick,beaten yogurt(to which salt and turmeric are added) to the poha mix and incorporate the ingredients into a batter.Keep it in mind that you already cleaned the poha with water,so it does have moisture in it even though you squeezed out most of it.Make sure the batter is nice and thick and not runny.If it is too thick you may add few drops of water at a time and make sure the batter is in the thick side but a little loose.


Let the batter rest for 10 minutes and meantime you prepare the idli plates by applying oil to them.Place a pot or dish with water on the stove and let the water get to a boil,make sure to cover it.Now add the baking soda to the batter and mix it thoroughly and spoon the batter into the idli moulds/plates and place the idli stand in the boiling pot of water and cover it and let cook for 15 minutes.


After 15 minutes switch off the stove and let the steam cool down and remove the idli's and serve them with your favorite chutney or spice powder or sambar.


Delicious Poha-Flaxmeal-Methi Leaves Idli's are ready to be served.

Note :
---------

1) This is the first time I made these idli's and we definitely loved them.A new way to enjoy poha.

2) Make sure you don't add too much liquid to the poha.Make sure the batter does not sit for more than 10 minutes.If the batter is soaked for long it becomes very soggy. 

Friday, February 18, 2011

Blog Anniversary and CWF-WF/WV: Tomato

Well , here is a milestone reached after a wonderful year of blogging :-) .I started my blog on Feb 18 2009 but never made it public nor did I blog much.I took blogging seriously only from Feb 18 2010 and made it available to public and here I am after 1 year with lots of amazing blogger friends and visitors of Sumadhura who keep me going with their wonderful words.

Learned a lot in this journey from my fellow bloggers and had a chance to participate in different events ,won a few awards and also initiated a bi-monthly event related to whole foods Cooking with Whole Foods(CWF).My heartful thanks to all my fellow blog-pals for their active participation  in guest-hosting CWF  as well as sending in delicious recipes for the events and making it successful and keeping it going.

As we are talking about CWF I would like to request my fellow bloggers and visitors of Sumadhura to participate in the CWF-WF/WV : TOMATO being guest-hosted by our dear blogger friend Sanyukta and make it a success with your wonderful entries.Friends if you are interested in hosting CWF mail me at kjsumadhura@gmail.com.

Once again thank you friends for your wonderful support and encouraging me even in my absence.I am feeling better now after continuous visits to the Chiropractor for the past 5 months which has helped me get better with my neck and shoulder problems.Am taking it slow with blogging so that I don't hurt my neck and shoulders and hope to participate soon in all the wonderful blog events.

Friday, February 11, 2011

Review : Cuisinart ICE-30BC Frozen Yogurt-Ice Cream & Sorbet Maker and a Delicious Homemade IceCream

Dear Friends and Visitors of SUMADHURA,Hope you all are having a good start this NewYear 2011 .

For a while now I was in search of a nice Ice Cream Maker and finally found the right one.It is the Cuisinart ICE-30BC Frozen Yogurt-Ice Cream & Sorbet Maker.

The first thing I liked about it , is the stainless steel finish and the sleek look it has.When coming to discuss its functionality, it is a very easy to use automatic ice cream maker that doesn't need too much brain work.Main thing to keep in mind is to freeze the freezer bowl over night in the freezer.It does make some sound while functioning but it is not disturbing.The ice cream is done just in 25 minutes.After the icecream is made transfer it into freezer safe container and freeze for 2 hours and is ready to serve.Even kids will enjoy making the ice cream by adding their favorite fruits ,nuts or chocolate bits through the wide opened mouth in the top to make their ice cream more colorful and  pleasing to their palate.

Well for now I used Cuisinart IceCream maker  to make a simple Vanilla IceCream with Chocolate Chunks , following the basic recipe provided in the recipe booklet provided by Cuisinart. 

Sometimes a video is more practical than said in words.The following videos shows you how easy it is to use this automatic Ice Cream Maker.Enjoy this virtual treat and definitely think of  buying the Cuisinart Ice Cream Maker from CSN Stores for $80 along with free shipping , when you are looking for a easy to use Ice Cream Maker.


P.S: This automatic ice cream maker from Cuisinart helps us make a wide variety of frozen treats in a jiffy.If you have a get-together or a potluck party to attend you can definitely volunteer to make a delicious ice cream for your family and friends.

Tuesday, December 21, 2010

Tried and Tasted on Tuesday's: Dec 21st 2010

Today is Tuesday and I am back today with a delicious dish that I tried and tasted in my kitchen following the recipe shared by one of my wonderful blog pal who presents her delicious dishes beautifully.This is a very healthy dish that could be made instantly and is ready in 30 minutes from start to finish.

Without further ado here is the bookmarked dish of the day--------

1)  Instant Quinoa Idli from Taste of Pearl City by Umm Mymoonah .


This was a very simple and easy to make dish and was a instant hit.We all enjoyed eating this delicious Instant Quinoa Idli with chutney.I followed most of her recipe as is except that I made the following changes:

I used red quinoa grains instead of regular quinoa and also used 1 cup sooji instead of 1/2 cup.I also added crushed ginger along with chillies to the batter.I also added 1/4 cup of grated carrot , a pinch of asafoetida,1/2tsp of ajwain(carom) seeds and few toasted cashews to the batter.

Thank you Umm Mymoonah for sharing this delicious and healthy dish with us.Please visit her blog for the recipe tried here today and also for many delicious dishes she has in store for us to try and to experiment.Will be back next week with more tried and tasted recipes.


This goes to Bookmarked on Tuesdays Event hosted by Priya Mitharwal .

Sunday, December 19, 2010

Fried Baby Potatoes---Mom's Special Dish

I definitely have been missing many blog events and all the blog pals from around the world for the past few months.I am very thankful to all the blog visitors and blog pals for being around and supporting me even during my irregular presence.Thank you friends,there is a lot of catching up to do.

My mother is visiting us and we all have been enjoying and relishing mom's cooking for the past two months.A lot of simple and traditional dishes have become a part of our cuisine.Well, some dishes do include the use of deep frying and others are authentic dishes passed on to us from generations.So enjoying various dishes from mom's magic hand from modern dishes to traditional recipes.

For the past many years I was so busy taking caring of my little ones and forgot how nice it really feels to be taken care of.It definitely feels out-of-the world when your mom is here with you.It feels like being taken care of again and I feel like I have become a little kid around her asking her to prepare my favorite dishes and sometimes even enjoying her feeding me:-) .It's an awesome feeling to have my mom here with us and spend time with  all of us. 

The dish I am sharing today is a very favorite dish for all of us.It's simple and easy to make and yummy to taste.Let us see how this simple dish is made------


Main Ingredients :
----------------------
Baby Potatoes....................1lb
Canola Oil..........................5tbsp
Salt.....................................to taste
Cumin flavored Paprika.......to taste

First clean the potatoes under cold water and boil them.Once the potatoes are boiled , peel the skin off them and keep them aside.Place a pan on the stove on medium-high heat and add oil.Once the oil is hot add the potaoes to the pan and let them fry for few miutes.(In the starting we want the heat to be on high so that the potatoes don't get mushy).


After few minutes slowly the potatoes start to turn golden in color.At this point turn the stove to medium heat so that the inside of the potatoes also gets cooked well and the outside stays crispier without burning.


After few minutes you can see that the potatoes have cooked well and turned crispier.Now you can tranfer the extra oil from the pan(after frying) to a bowl.You can see that there is no oil in the pan below.Now add salt and cumin-flavored paprika to the fried baby potatoes and stir for a minute and switch off the stove.


Crispy and delicious fried baby potatoes are ready to be served with hot rice and ghee.Believe me, if you leave them on the table they will all be gone before you even start your meal.Enjoy!


Related Posts with Thumbnails

Copyright Policy

Unless otherwise noted, Sumadhura is the legal copyright holder of all the written material and pictures posted in this blog .The content here may not be used , reprinted or published without the written consent of the author. All the recipes posted here are made according to the tastes of my family and the measures used in the recipes here are approximate.